House Building Flashback

I had to do some house repairs today so was reminiscing about my house building experiences. Here’s some early photos of the building of our $500 house. You can see our story in my first post HERE.

I was actually replacing the three support posts today.  The first time in 35 years so not bad.

I was actually replacing the three support posts today. The first time in 35 years so not bad. We definitely lived in the woods and didn’t want to cut down any more trees than necessary which, looking back, made it kind of dark.

Looking to the front of the loft

Looking to the front of the loft

Looking to the back of the loft

Looking to the back of the loft and center pole

Center pole

Center pole

Center and ridge poles with strapping

Center and ridge poles with strapping

Hand Split Cedar Shakes

01

Old cedar log remnant

When I first moved up to the Sunshine Coast in the early 1970’s there were quite a few people earning their living by making hand split cedar shakes.  They would explore the forest looking for old cedar windfalls or remnants from the logging days of the early 1900’s.  The trees would sometimes be quite large in diameter which was ideal for shake cutting.  In those days it was easier to find lengths of ‘clear’ cedar logs, i.e. they had no branches, and were ideal as they would make beautifully straight grained shakes.  Even though the wood had been laying for decades it would be perfectly dry inside and much easier to split than newer, moist wood.

Here’s the process:

The exposed end of the log is cut off

The exposed end of the log is cut off

A 24" (61 cm) section of log is cut. Shakes are often 18" (45.7 cm) or 24" (61 cm).

A 24″ (61 cm) section of the log is cut into the rough shake block. Shakes are often 18″ (45.7 cm) or 24″ (61 cm).

The block is split into wedges

The block is split into wedges

One finished block ready for splitting into shakes

One finished block ready for splitting into shakes

Splitting tools - a froe and my very old wood mallet

Splitting tools – a froe and my very old wooden mallet

The froe is lined up 3/4" (1.9 cm) on the edge of the block which will be the thickest width of the shake

The froe is lined up about 3/4″ (1.9 cm) from the edge of the block which will be the thickest width of the shake

The top of the froe blade is hit with the mallet and the froe is worked down a short way down the block

The top of the froe blade is hit with the mallet and the froe is worked a short way down the block

If the wood is dry a slight twist on the froe handles will 'pop' off the shake

If the wood is dry a slight twist on the froe handle will ‘pop’ off the shake

Turning the block end for end will produce a tapered shake which is easier when laying down a roof

Turning the block end for end for each shake will produce a tapered shake which is easier when laying down a roof

The shakes ready to have their edges trimmed which produces kindling for the fire

The shakes ready to have their edges trimmed which produces kindling for the fire

Trimming the shakes

Trimming the shakes

The wonderful straight grain of a split cedar shake

The wonderful straight grain of a split cedar shake

This is how the shakes would be laid out. The bottom row is doubled to cover the gaps. About 1/3 of the shake is exposed to the air but that can vary with the slope of the roof.

This is how the shakes would be laid out. The bottom row is doubled to cover the gaps.
About 1/3 of the shake is exposed to the air but that can vary with the slope of the roof.

The top piece of board is an 18" sawn shingle which are commonly used today, often pressure treated. Often the grain can be going any which way and I personally don't like them as much. You can see the natural channels in the shake below that carry rain water off you roof quickly.

The top piece is an 18″ (45.7 cm) sawn shingle, commonly used today, often pressure treated. The grain can be going any which way and I personally don’t like them as much. You can see the natural channels in the shake below that carry rain water off the roof quickly.

The Pump House

The Pump House

I have made 8 inch (20.3 cm) x 8 foot (244 cm) boards using the same method which we used for interior wall covering.  It is a wonderful feeling to find an old scruffy log in the woods and turn it into something so useful and attractive.  


Image

The Gate

I took a few pictures of an intriguing gate that I saw in Nova Scotia in 2006 and always wanted to make one so this past Summer I gave it a go.  It was a great project and it is a wonderful gate.

Gate 09_watermarked

The 23 foot (7 metre) upper crossbar hinges on a piece of iron rod on the top of the 55 inch (140 cm) post closest to the camera. The other end rests on the post near the tractor.

Peeling the uprights

Peeling the log uprights

Gate 03_watermarked

Peeled 4 foot (1.2 metre) uprights

Gate 12_watermarked

Shaping the uprights

Upright inserted through 1.5" drilled hole and pinned with a dowel

Upright inserted through 2 inch (5 cm) drilled hole and pinned with a dowel

Pinned upright

Pinned upright

Three uprights in place

Three uprights in place

3.5 inch (8.9 cm) hole drilled in upright for lower 16 foot (4.9 metre) crosspiece

3.5 inch (8.9 cm) ) hole drilled in upright for lower 16 foot (4.9 metre) crosspiece

Lower crosspiece in place

Lower crosspiece in place but not trimmed to length

Middle crosspiece in place

Middle crosspiece in place

Counterweight chained to the end of the top crosspiece.  This was an old cast iron stove that we had carried around for years.

Counterweight chained to the end of the top crosspiece. This was an old cast iron
stove that we had carried around for years.

The gate with the counterweight

The gate with the counterweight which is balanced on the post.  The old stove is full of old metal logging parts I found in the woods and weighs about 300 pounds (137 kilos).  The gate portion to the left of the post weighs the same.

The upright post is capped with an old cast iron stove trivet we found somewhere.  The only place the crosspiece touches the upright is on the curved metal band.  I put a little grease where the two metals make contact.  The fences is so well balance that the whole thing cna be easily open and closed with one finger.  It feels like it is floating.  The metal gear is another pied of loggin metal an is sitting over the metal hinge rod - purely ornamental.

The upright post is capped with an old cast iron stove trivet we found somewhere. The only place the crosspiece touches the upright is on the curved metal band. I put a little grease where the two metals make contact. The fences is so well balance that the whole thing can be easily opened and closed with one finger. It feels like it is floating. The metal gear is another piece of logging remnant and is sitting over the metal hinge rod – purely ornamental.

Image

Split Rail Fence

Split Rail 01_watermarked

Cedar Windfall

Every Winter we will have one or two windstorms strong enough to bring down big trees.  This has helped supply me with firewood for the past 35+ years we have lived here.  We rely entirely on wood heat and because of the windfalls we have rarely needed to cut a living tree down for burning.  

The windfalls also supply building material – wood for milling into lumber or for making shakes.  I had always wanted to try making a cedar split rail fence and since I had a small gap near the entrance of our driveway, I thought I’d give it a go.  The cedar I used was from a large 2 foot (61 cm) diameter cedar that had snapped off about 15 feet (4.6 metres) above it’s base.  It had been lying in the woods about three years and I have been keeping it in mind for a project.  The great thing about cedar is that it can last literally decades lying in the woods.

Split Rail 02_watermarked

The first thing I did was cut the tree into 8 foot lengths.
Using wedges and a crowbar I split the tree in half down it’s center.

Split Rail 03_watermarked

Starting the split


Split Rail 04_watermarked

I continued splitting the sections down to the size I wanted.
One eight foot length produced eight rails.

Split Rail 05_watermarked

The Wedge and Sledge Method

Split Rail 06_watermarked

Two Hours Work

It was then just a question of transporting the rails (on my back) and assembling the fence.  The rails are laid out in a zig-zag shape, the intersecting pieces are drilled with a 3/4″ hole (2 cm). A piece of 1/2″ (1.27 cm) iron rod (reinforcing bar) is then hammered through and into the ground.  A fast, easy and strong fence to build that will last for years. 

Split Rail 15_watermarked

Image

Survivor

Big Fir 03_watermarked

While there is lots of evidence of trees that didn’t survive the initial logging we have one tree that did.  It is a magnificent Douglas Fir that towers over our house.  At the base of the tree the trunk measures 21 feet (6.4 metres) in circumference  and it is estimated to be around 850 years old.  At some point the top of the tree broke off at the 150 foot (45.72 metre) mark so it is hard to know how tall it would have been in it’s undamaged state.  No sign of the top remains on the ground but it could have broken 300 or 400 years ago and rotted away.

Big Fir 02_watermarked

We’re not sure why this tree wasn’t taken.  One hundred and twenty years ago, when the area was logged, the tree would have been near to the same size as it is now while the surrounding logged tree stumps average 14 feet in circumference.  It is possible, even then, that the fir was just too big to handle.  For whatever reason it was left, we are thankful to have it with us.  We have watched it weather many a wind storm with barely a quiver though it has been struck by lightening once or twice and the branches that fell are almost as large as the trees surrounding it.

Big Fir 01_watermarked

Big Tree- Fog_watermarked

At some point a small fire had ignited at the base of the tree, probably due to lightening, but the 8 inch (20.3 cm) thick bark helped insulate it from any damage.

Bark Texture 01_watermarked

Bark Texture 02_watermarked

Image

Silent Witnesses

Remnants_watermarked

Logging Remnants


Our acreage is surrounded by about 200 acres of second growth forest.  The area was initially logged in the very early 1900’s and we still find evidence of those logging days.  The tree cutting then would have been done by hand with axes and crosscut saws.

Old Saw_watermarked

The loggers cut notches in the tree and stuck a plank, called a springboard, into the notches.  These would be used for the loggers to stand on to make their saw cuts.  They were usually placed 4 – 6 feet above the base of the trees and allowed the loggers to avoid the flair at the base of the tree.


Click on any of the photos to see a larger image

Throughout our woods old stumps stand silent, bearing witness to those day.  Some still have the notches for the springboards.  They are always changing – either in colour or texture or size.  The more resilient cedar stumps usually have rotted out centers and often new trees are growing out of the old tree.  The fir and hemlock are in a greater degree of decay providing a medium for salal, ferns, moss and new tree seedlings to grow.  Insects and beetle larva live in the decaying wood and they become food for the woodpeckers, racoons and bears.  Hollows in the roots of the stumps have become the homes for squirrels, mice and other creatures.

Tiny House_watermarked

Door by Maria

Image

Beginnings

Our Road - 1975

Our Road – 1975

This new series is a going to be a photographic tour of our acreage.  I plan to share a bit of our history, some of our building projects, our garden, forest, wild animals, insects, stuff we have collected and favourite photographs – not in any particular order.
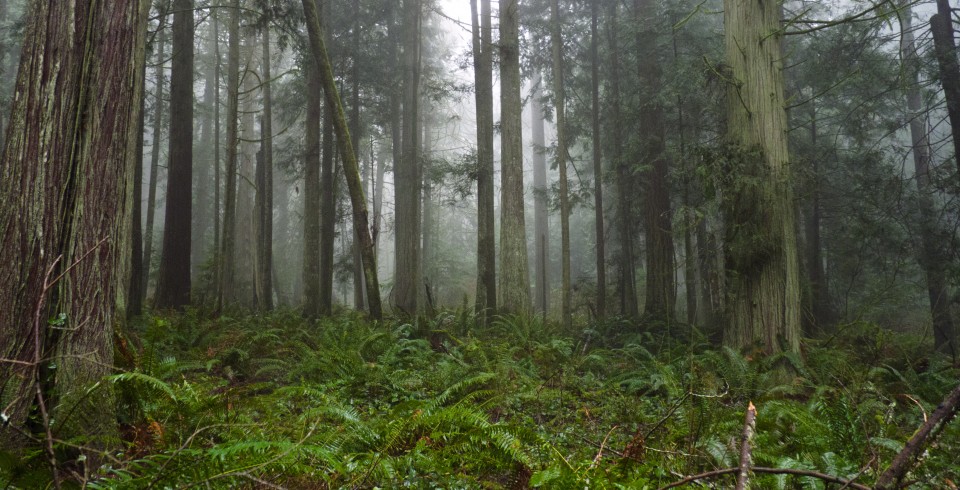
In 1975 we purchased 5½ acres of land close to town but still “in the bush” with dreams of building a self-sufficient homestead.  To reach our acreage we had to travel down an old logging road which was built in the 1890’s.  The property had originally been homesteaded before the second war and we found an old hand dug well so our first project was to clean and crib it.
The Well

The Well

I had an idea of what I wanted to build and even drew crude plans while in high school.  It was the ‘back to the land’ era and I had friends living in geodesic domes, small hand built houses and a school bus .  Innovation, recycling and building cheap was key.

We had wanted to build a geodesic dome but our only tools were a hammer, Swede saw, sharpened shovel (for peeling logs) and a butcher knife. We also didn’t have electricity so we decided to build a hexagon instead. We had never built anything before so I made a cardboard model and we plunged ahead.
The Floor

The Floor

 
Our house started with 10 flat rocks for post foundations.  From there it was a series of, “It will be more solid when. . .”  the floor is framed, the floor is laid, the walls are framed, the walls are sheathed, the roof is framed, the roof is sheathed.  And finally with the house more or less finished it did firm up quite well though there is still some degree of flexibility to allow for earthquakes or the occasional tree dropping on it.  The only time you notice it now is when the washer is on rinse cycle and it feels like the San Andreas Fault acting up.   
 
Frame
All the framing was done with trees cut on the property and some were not exactly straight.   A level wasn’t of much use so everything was eyeballed.  The original house was the hexagon with a bump-out that we called the Sun Room which turned out to be a bit of a misnomer because we didn’t want to cut down any more trees than necessary so it was a very fortunate sunbeam that made it through the forest to shine on the Sun Room.  In the winter we had to keep at least one kerosene lamp going at all times in order to read or whatever.
The Peak

The Peak

The center pole of the hexagon was 17′ high and we had a loft attached on one triangle and over the bump-out.  The rest was a high open ceiling going to the peak which was all skylight.  Because of the lack of money it was covered with clear poly.

Centerpole, 1976

Eventually we closed in the entire loft area creating a second floor and a low ceiling on the first floor.  This gave us more room and helped keep the heat down lower.  Later we added on various wings using conventional lumber which made building much easier.
When we moved into our house in February of 1976 it had cost us $500 to build.

When we moved into our house in February of 1976 it had cost us $500 to build.


In 2012 we bought the 5 1/2 acres next door so now have 11 acres to explore and enjoy.